Using Tracing Images
Dreamweaver's Tracing Image feature is a great tool for organizing your site layout. You can comp out your site in say Fireworks or Freehand and then bring it into Dreamweaver to use as a guide to align tables and layers...really anything!
You can use images in either .jpg, .gif, or .png formats.
Tracing images do not get exported with the html. So you don't have to worry about the size of the file. For example, many of the png's I use for tracing images are upwards of 500k, depending on the project. Don't be concerned with that because none of that will affect your final HTML document.
Step 1: Create a new document
Make sure you've defined a new site or are working in a already Defined site.
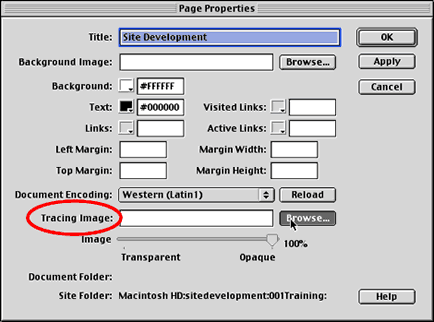
Step 2: Insert the Tracing Image
- With the new page open, go to Modify>Page Properties.
- Go down to Tracing Image and click the Browse button to locate the image you wish to use as the Tracing Image.
Note, be sure not to select Background Image as this is NOT what you want.
Background images are images that WILL be part of your final HTML document and will be visible.
 |
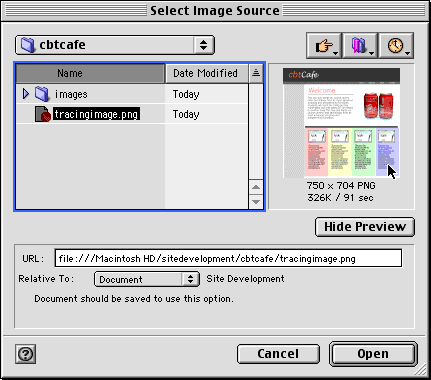
Step 3: Select the Tracing Image
Once you've located the image, select it and choose Open.
 |
Your Tracing Image is now visible on your document and you can begin creating tables, layers and images around it.
Step 4: Modify the Tracing Image's Opacity
As you begin designing around the Tracing Image and you start having more elements on your page, you may start noticing you're getting confused between the Tracing Image and the newly added elements. Try reducing the opacity a bit by dragging the Transparency slider.
 |
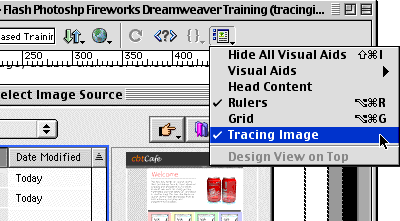
Step 5: Turn off the Tracing Image
- You can also quickly turn on and off the Tracing Image by going up to the View Options and selecting/deselecting Tracing Image.
- You can also go up to Modify>Page Properties and turn down opacity or delete the Tracing Image there.
 |
Step 6: Adjust the Tracing Image's position
Adjust the position of your tracing image by going up to View>Tracing Image>Adjust Position...
- Enter a value for the new position.
- While the Adjust Tracing Image Posit
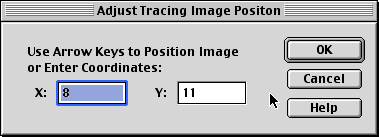 ion Dialog window is open, you can also use the arrow keys to move the Tracing Image around the document.
Step 7: Aligning with Selection
You can also position the Tracing Image by aligning it with other elements in your document.
- Simply select an element in your document
- Go to View>Tracing Image>Align With Selection and the upper left corners of both the Tracing Image and the selected element will align.
No comments:
Post a Comment