Show-Hide Layers
In this example we're going to take a look at using Layers and how you can use the Show-Hide Layers to create interactivity with menu items.
To preview the final version, click here
Step 1: Defining a New Site
You should define a new site for this tutorial. If you need assistance on Defining Sites, click here to go through that lesson...It will only take 5 minutes and if you haven't already learned to Define Sites, it could possibly be the best 5 minutes you spend in Dreamweaver.
Step 2: Setting Up the Site
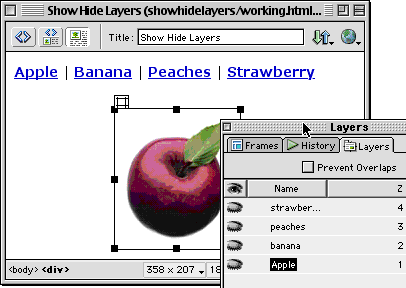
My site for this lesson is called "showhidelayers" and in this folder I have an index.html and 4 images: apple.jpg, banana.jpg, peaches.jpg, and strawberry.jpg.
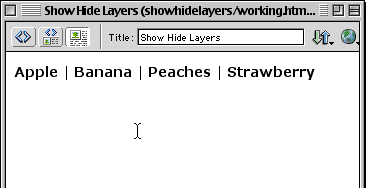
- Create a new document and save it.
- Type out the following names for links: Apple | Banana | Peaches | Strawberry.
 |
Step 3: Creating a New Layer
- Click the Draw Layer button
- On the Objects Palette and drag out a new layer.
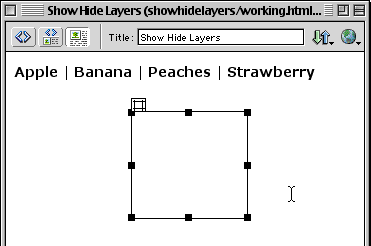 |
![]() Don't worry about the size of the layer or the positioning for now. We'll clean that up soon enough.
Don't worry about the size of the layer or the positioning for now. We'll clean that up soon enough.
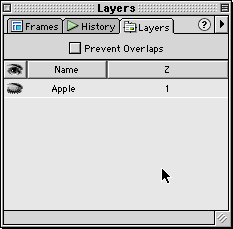
Step 4: Renaming Layer 1
- Go over to the Layers Palette and you'll notice "Layer 1" has been created. That's the layer you just created.
- Double click the "Layer 1" to rename the layer to "Apple"
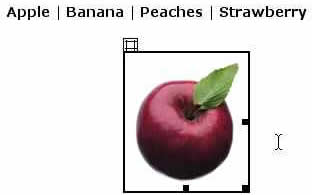
Step 5: Inserting an Image in the Apple Layer
- Go back to the layer you just created and position your cursor inside the layer and click once.
- On the Objects Palette, click the Insert Image to insert an image into the layer. In this case, I'll insert the image: apple.jpg.
Here you'll see the apple positioned inside the layer.
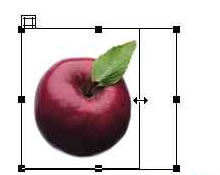
Step 6: Resizing the Layer
- Scale the layer to fit perfectly around the apple image.
- Move your cursor over the edges of the layer until you see the cursor change into a "hand". Once you see the "hand cursor", click once to select the layer. Once you've selected the layer, you'll notice the black selection handles. Move your cursor over the black selection handle until the cursor changes into a double-sided arrow.
- Grab the middle one on the right side and drag inward. This will scale the layer to the width of the image.
- Do the same thing for the bottom resize handle, dragging towards the center of the image.
![]() You can also resize the layer to the size of the image numerically. Click once on the image and then go up to the Properties Inspector and in the image properties, note the width/height and input the values in the W and H fields (Width and Height).
You can also resize the layer to the size of the image numerically. Click once on the image and then go up to the Properties Inspector and in the image properties, note the width/height and input the values in the W and H fields (Width and Height).
 |
Step 7: Turning Off the Apple Layer's Visibility
- In the Layers Palette, click in the Eye-Icon Column for the Apple Layer..
- To hide the layer, click until you see the eye closed.
 |
That's basically it. Repeat steps 5-11 for your remaining images. Once you've completed that, go on to the next step for next part of the lesson:)
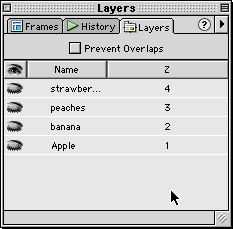
Here's what my document/layers palette looks like with all four layers:
 |
Step 8: Adding the Behaviors
Now, we want to add the behaviors to each of the links in the menu so that when we mouse over each link, the appropriate image appears.
- Double click inside the "Apple" link up top to select it.
- before we can add the behavior, we need to create a null link.
- You do this by typing the # sign in the link window. For more on null links, click here.
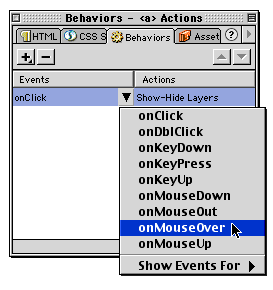
- Go over to the Behaviors Palette and click the plus (+) sign.
- From the drop down menu, select Show-Hide Layers.
- Here you'll see the four layers you created for your 4 images.
- Click the "apple" layer and then click "Show" to show the layer. Click OK.
- Next, let's change the "OnClick" to "OnMouseOver". We need to add the "OnMouseOut" behavior to the link so that when you remove your mouse from the "apple" link, the apple image disappears.
 |
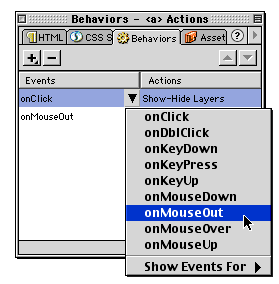
- Click the plus sign (+) again and select Show-Hide Layers again.
- Again select the Apple layer, this time selecting "hide" from the buttons on the bottom. Click OK.
- Next, change the action "onClick" to onMouseOut.
 |
Step 9: Testing your Behaviors
- Let's do a quick Preview In Browser to see if it's working.
- After you see it looking good, go ahead and repeat steps 12-20 for your remaining images.
Here's how your Layers Palette should look for the 4 images:
Step 10: Aligning the Layers
After Previewing in my Browser, I notice that the layers/images are kind of all over the place and not very cleanly organized. In this final section, we'll align our layers to be centered both horizontally and vertically to each other.
- Determine where you want the images to be. I'm going to use the center of the nav bar as a guide, and about an inch down.
- Make one of the layers visible by clicking on the layer. The layer will only be temporarily visible. We're just using it to assist us in determining where we want to align the layers.
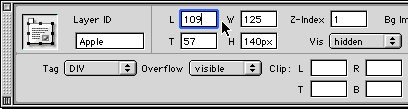
- Click on the Apple layer and drag it into position.
- Once in position, notice the coordinates of the layer by going up to the Properties Inspector and making a note of the L (left) and T (top) numbers.
- In this example it is L:109 and T:57. Now, either remember the those number for the positioning or write it down (remember 2 numbers? no way!)
- Click away from the layer to deselect it.
|
|
Step 11: Repositioning the Banana Layer
- Select the next layer, in this case it's the Banana Layer. Don't worry about moving it
- Go up to the Properties Inspector and in the T and L fields, input the numbers you wrote down (or remembered) into their respective fields and hit enter.
- This moves it to the same position as the Apple Layer without having to fuss with moving it manually.
![]() In case you wanted to manually move it, you can either drag the layer as you did with the Apple Layer or you can use your arrow keys to nudge it one pixel at a time.
In case you wanted to manually move it, you can either drag the layer as you did with the Apple Layer or you can use your arrow keys to nudge it one pixel at a time.
That's basically it. Just repeat step 26 for the other two layers and you're finished!
Preview In Browser to test your page or click here to view my version.
source::http://www.cbtcafe.com/dreamweaver/showhidelayers/showhidelayers4.html
No comments:
Post a Comment