Tuesday, August 3, 2010

Defining A Site

Defining A Site


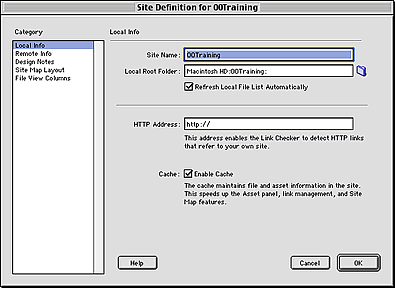
Dreamweaver relies on you to create a site for each and every project you work on within Dreamweaver. This ensures all files and links are properly defined. If you don't define the site ahead of time Dreamweaver will give you warnings about nearly everything. It's fast, it's easy and it's integral to Dreamweaver.

Step 1: Define a Site

  1. Go to Site>New.. to open the Site Definition dialog window.
  2. You can now begin entering your site information.

Step 2: Enter a site name

You can use any name here. This is for organizational purposes and won't display in the browser.

Step 3: Define the Local Root Folder

This is where the site files for this particular site will be kept. I generally keep a site development folder with client and project sites inside that. Click the Browse button to either navigate to an existing folder or to create a new folder.

Once you've selected or created the folder, click Choose (Mac) or Select (windows). You can also type in the path to the folder but for accuracy it's always best to browse to it.

Step 4: Select "Refresh Local File List Automatically

I always check this so you should too. J/K. But this ensures your any changes you make are reflected immediately.

For example, if you added some new images or other media to your site folder you would need to manually refresh the site list each time if you didn't have this option selected.

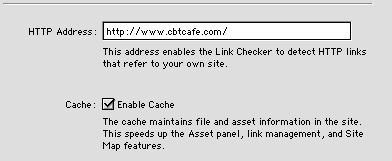
Step 5: HTTP Address

Enter the URL that you're using for this site. It will enable Dreamweaver to check links in your site that use Absolute URLs

Step 6: Select the Cache option

This will greatly increase Dreamweaver's speed in checking links.

You may get a box telling you about how Dreamweaver needs to create the site cache. You don't need and most likely won't want to continue seeing this box so you can select for it not to display again.

Click Create

Step 7: Click Done

You will need to do this with EVERY site you work with from within Dreamweaver.


source::http://www.cbtcafe.com/dreamweaver/definesite/definesite.html


Preview In Browser

Preview In Browser


One of the most used features for testing your sites is the Preview In Browser feature in Dreamweaver. This is one of the most used keys (F12) on my keyboard when working in Dreamweaver. It lets you see what your site will look like in a particular internet browser.

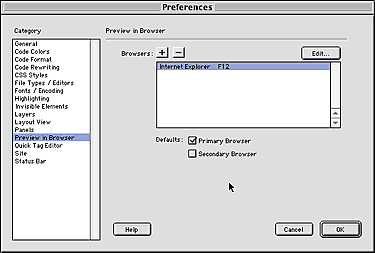
Step 1. Open the Preferences dialog box by going to Edit>Preferences...

Step 2. Select Preview In Browser from the Category column in the left hand side.

Step 3. Depending on your current configuration you may or may not have a default browser already selected.

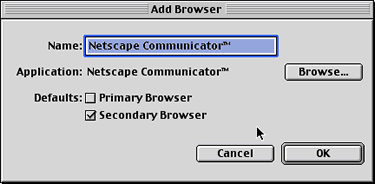
Step 4. To add a browser, click the plus sign. You can also click Edit to add a primary or secondary browser.

Primary Browser refers to the browser that is associated with the F12 key.

Secondary Browser is launched by clicking Control-F12/Command-F12

Step 5. Do the same for the secondary browser making sure you select the correct check box.

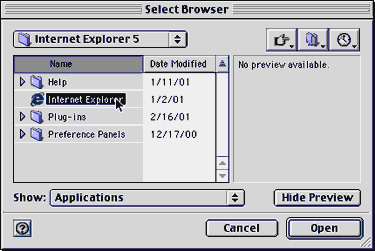
Step 6. Now navigate to your desired browser's application program and select it.

Step 7. Click OK when you're finished.

Step 8. Now, when you want to check your work you need only to click the F12 key for primary browser or click Command-F12 to preview your work in your secondary browser.

source::http://www.cbtcafe.com/dreamweaver/previewbrowser/preview.html


Single Line Spacing

To get a single line space in Dreamweaver, hold down the Shift key and click Return.

That's it:)

You can also use the

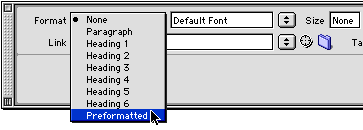
                or preformatted option. To do                this go up to the Properties Inspector and under Format, choose                Preformatted from the drop down                options. This will let you type out text as if you were in a normal                word processor.

Dreamweaver: Single Line Spacing

source::http://www.cbtcafe.com/dreamweaver/singlespacing/singlespacing.html

Using Tracing Images

Using Tracing Images


Dreamweaver's Tracing Image feature is a great tool for organizing your site layout. You can comp out your site in say Fireworks or Freehand and then bring it into Dreamweaver to use as a guide to align tables and layers...really anything!

You can use images in either .jpg, .gif, or .png formats.

Tracing images do not get exported with the html. So you don't have to worry about the size of the file. For example, many of the png's I use for tracing images are upwards of 500k, depending on the project. Don't be concerned with that because none of that will affect your final HTML document.

Step 1: Create a new document

Make sure you've defined a new site or are working in a already Defined site.

Step 2: Insert the Tracing Image

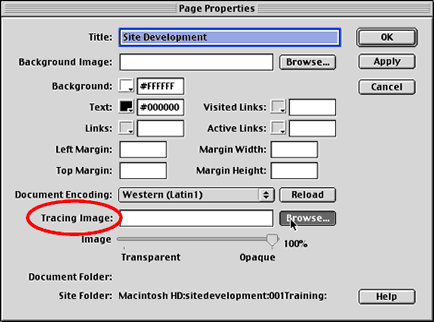
  1. With the new page open, go to Modify>Page Properties.
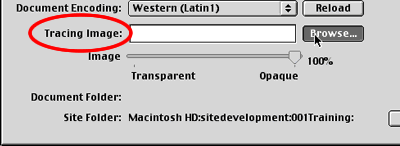
  2. Go down to Tracing Image and click the Browse button to locate the image you wish to use as the Tracing Image.

Note, be sure not to select Background Image as this is NOT what you want.

Background images are images that WILL be part of your final HTML document and will be visible.

Step 3: Select the Tracing Image

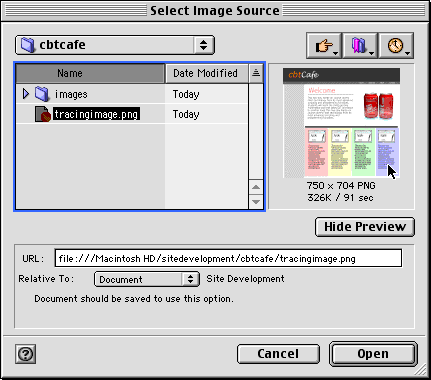
Once you've located the image, select it and choose Open.


Your Tracing Image is now visible on your document and you can begin creating tables, layers and images around it.

Step 4: Modify the Tracing Image's Opacity

As you begin designing around the Tracing Image and you start having more elements on your page, you may start noticing you're getting confused between the Tracing Image and the newly added elements. Try reducing the opacity a bit by dragging the Transparency slider.

Modify the Tracing Image's Opacity

Step 5: Turn off the Tracing Image

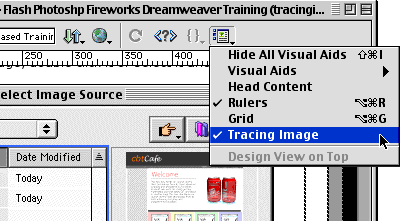
  1. You can also quickly turn on and off the Tracing Image by going up to the View Options and selecting/deselecting Tracing Image.
  2. You can also go up to Modify>Page Properties and turn down opacity or delete the Tracing Image there.
Turn off the Tracing Image

Step 6: Adjust the Tracing Image's position

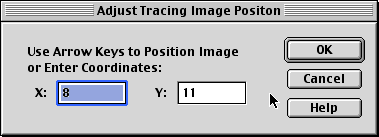
Adjust the position of your tracing image by going up to View>Tracing Image>Adjust Position...

  1. Enter a value for the new position.
  2. While the Adjust Tracing Image PositAdjust the Tracing Image's positionion Dialog window is open, you can also use the arrow keys to move the Tracing Image around the document.

Step 7: Aligning with Selection

You can also position the Tracing Image by aligning it with other elements in your document.

  1. Simply select an element in your document
  2. Go to View>Tracing Image>Align With Selection and the upper left corners of both the Tracing Image and the selected element will align.
source::http://www.cbtcafe.com/dreamweaver/tracingimg/page2.html

Advanced Open Browser Window v.2.0

Advanced Open Browser Window v.2.0


Extension Author: George Petrov
Download the Extension: www.udzone.net/go?197

George Petrov's new extension is one of the best ways for opening new windows in Dreamweaver 4. It not only offers the normal features of opening new windows such as window dimensions, but also offers some extra features that give you more control over the new window such as the window's position on screen. If you want your new window to be centered or to either side of the screen you can do so with the click of a button. You also have control over how long the window remains open by setting the Auto Close feature. A nifty feature in some cases.

Step 1: Applying the Behavior to an Object

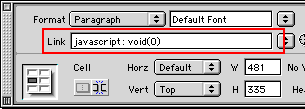
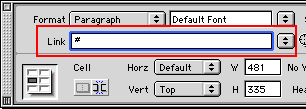
To apply the Behavior to text, you'll need to first make that text a Null Link. Do so by typing the pound sign (#) or javascript: void(0) in the link field in the Properties Inspector.

Applying the Behavior to an Object
  1. With either the text or the image selected, go to the Behaviors Panel (Windows>Behaviors) and select Advanced Open Window 2.0. Most likely this will be the first behavior in your list.
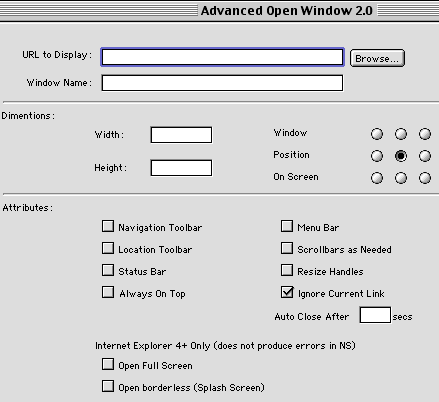
  2. This brings up the dialog window:
Applying the Behavior to an Object

Step 2: Specifying your new window's information

  1. URL to Display: This is the location (relative or absolute) of the new window you're opening. If it's an absolute location, type it in the field. It's a good idea to include the "http://". If it's a relative link you can type in the path OR better, use the "Browse..." button to navigate to the file. Browsing for the file rather than typing in the link will help ensure you get the path to the file correct.
  2. Window Name: It's a good idea to name the window. You can name it anything you like. Just make sure not to include spaces or special characters.
  3. Dimensions: Specify the Width and Height for the new window in pixels. If no window size is specified, the new window will open at the same size as the window that opened it.
  4. Window Position On Screen: Select where you want the new window to popup. Just select a radio button to change the position.
  5. Navigation Toolbar: Select this option if you want the window to display the Forward, Backward, Stop, etc. buttons in your window.
  6. Location Toolbar: This is the area that displays the path or location the page is located.
  7. Status Bar: This is the area of the window that displays information such as load time, and custom messages appear. This is located at the bottom of the browser window.
  8. Always on Top: Selecting this option will keep the popup window in front of the other windows. NOTE: Any forms on your popup window won't work because the window gets selected all the time - so the fields loose focus.
  9. Menu Bar: If you check this option the new window will contain the menu items: File, Edit, View, Go, etc.
  10. Scrollbars as Needed: Selecting this option will allow scrollbars to be present if the content in the new window exceeds the dimensions you set for the popup window size. If you are creating a new window that matches the same size as its contents you wouldn't need to select this option since there wouldn't be any content to scroll.
  11. Resize handles: Select this option if you want to allow the window to be manually resized the window by dragging the bottom right corner of the window or by clicking on the Maximize button.
  12. Ignore Current Link: If you specified a null link by typing in "#" or "javascript: void(0)" and don't want the main document to refresh itself, select this option.
  13. Auto Close After _ Secs: If you want the new window to close after a set amount of time, enter a value (in seconds) in this field.

Internet Explorer 4+ Only (Does not produce errors in Netscape)

  1. Open Full Screen: Check this option will open the new window to a size that fills up the viewers screen.
  2. Open Borderless (Splash Screen): Checking this option and your window will open without a border or any of the menus.
source::http://www.cbtcafe.com/dreamweaver/openwindow/adv_openwin.html

Meta Tags Using Meta Generator Extension

Meta Tags Using Meta Generator Extension


Using meta tags has never been cooler than with the new extension, Meta Generator from the Dreamweaver Exchange. Traditionally, you would use the default Head object in the objects panel to create and insert meta tags. With this new extension, you have almost 40 custom tags you can create from within this one object!

You can click here to jump to Macromedia's Dreamweaver Exchange. You'll have to sign in or create an account to get it. It's free and painless so do it!

We'll begin from here with the premise you've already downloaded and installed the extension.

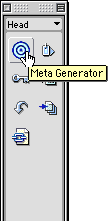
Step 1. With a new document, click on the Head Object in the Objects Palette.

Step 2. Select the Meta Generator button. It will be the Blue Target looking object, it will most likely be located in the top left corner.

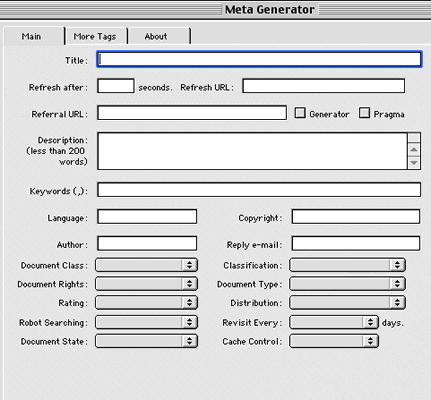
Step 3. This will launch the Meta Generator window. Here you can create the custom meta tags.

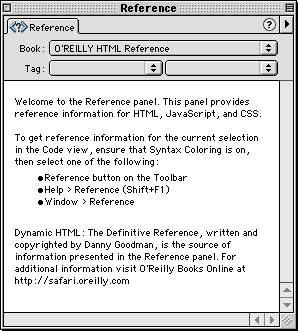
Step 4. Entering the information is straight forward. If you have any questions about what a particular tag is, click Command-Shift-F1 to bring up the References palette and look it up in there. It's terrific!

Or, you can go to DMEDIA's site and check out their descriptions of the tags

source::http://www.cbtcafe.com/dreamweaver/extensiontutorials/metagenerator/metagenerator.html

Changing Dreamweaver's Default Page


Changing Dreamweaver's Default Page

You might have noticed that every time you launch Dreamweaver, a blank page opens up titled "Untitled Document". This page has the same basic information in it every time. If you're working on a large project and don't want to have to change that information each time, you can customize that document with your OWN default information.

  1. Open Dreamweaver
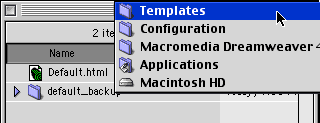
  2. Navigate to the Macromedia\Dreamweaver\ Configuration\Templates folder on your hard drive. Inside Templates is a page called Default.html. This is the page Dreamweaver launches each time the program starts.
  3. Back up this file. Always a good idea to do this:)
  4. In Dreamweaver create a new document. Go ahead and modify the Page Properties the way you want. You can give the document a name, say of your Company, insert the meta tags and anything else you want to do to it.
  5. Once you're satisfied with the settings, go ahead and save it as Default.html and save it in your Macromedia\Dreamweaver\ Configuration\Templates\ folder.
Default page

Create a new file in Dreamweaver and you should see your changes:)

source::http://www.cbtcafe.com/dreamweaver/defaultsettings/defaultsettings.htm


Disabling New Document

Disabling New Document


If you're like me, you don't need to create a new page everytime you start Dreamweaver. Most of the time I'm working on an existing site and it just gets to be a pain (mind you, not a large one, just a little one) to have to close out the new document each time I start Dreamweaver.

Go to Edit>Preferences...

Next, just select the first checkbox: Show Only Site Window on Startup.

That's it! The next time you start Dreamweaver, only your Site Window will open.

source::http://www.cbtcafe.com/dreamweaver/disablingnewdoc/disablingnewdoc.html


Changing Status Bar Messages

Changing Status Bar Messages


The Status Bar is located at the bottom left of your Browser Window and displays both a default message and the URL for any links the user mouses over.

Step 1: Getting Started

  1. Begin with either a new document or an existing one you'd like to apply the Status Bar Message to. We'll apply the Status Text to the Link in the next step, "Behaviors Panel".
  2. Select the text or object you want to apply the Status Text to. I will highlight the words "Behaviors Panel. In the Behaviors Panel, select Set Text>Set Text of Status Bar.
  3. The Set Text of Status Bar dialog window will open. Enter any text you would like to have displayed. Click OK when you're finished.
Status Text

Step 2: Tesing Your Page

Preview In Browser by hitting F12 and look at the Status Bar message.

Tesing Your Page

That's all there is to it. Now the hard part: going thru the entire site and changing all the messages:(

source:http://www.cbtcafe.com/dreamweaver/statusbar/statusbar.html


Insert Flash Buttons

Insert Flash Buttons


Step 1: Begin with a new document

Step 2: Inserting the Flash Button

In the Objects Palette, click the Insert Flash Button Icon

Inserting the Flash Button

Step 3: Modifying the Button

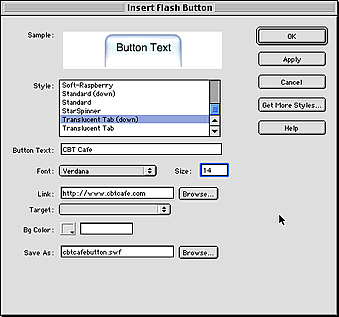
  1. In the dialog box for Inserting Flash Buttons, browse the button styles to select one you like.
  2. To preview a style click on it in the list to view it above.
  3. Once you've selected a style you like, type in some text to appear on the button. It's best to use basic fonts for better compatibility.
  4. Click Apply. This puts the button in your current document and you can preview it on your page. If you want to select another button, go ahead and click another one and click apply again, this will replace the current button with the new one you just selected.
  5. Select a URL to go to when the button is clicked. You can also browse to a file using the browse button.
  6. Select a background color (if desired) and finally, give your button a name if you don't want to use the default name provided by Dreamweaver. Click OK when finished.
Modifying the Button

Step 4: Previewing Your Button

  1. You can test the text by either clicking F12 to open it in your default browser or
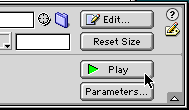
  2. Click the text once and in the Properties Inspector, Click the Play button. If this button isn't available, you will need to expand the Properties Inspector by clicking the downward facing arrow in the bottom right hand corner.
  3. After pushing the Play button, move your cursor back and forth over your newly created text. You should notice the rollover effect you just created.

Preview your button

Preview your button

Step 5: Editing your text

Double click the Flash Text to bring up the Insert Flash Buttons window

OR

  1. Click it once to select the button
  2. In the Properties Inspector, click Edit in the top right hand corner and the Insert Flash Text dialog box will pop up.
  3. Make your changes and click OK.
source:http://www.cbtcafe.com/dreamweaver/flashbutton/flashbuttons.html

Changing The Color Of A Form Button

Changing The Color Of A Form Button


Did you know you can change the color of your form buttons? Yup, it's easy. Just use CSS to do it.

Step 1: Getting Started

  1. On the Forms Category on the Objects Palette
  2. Click the Insert Button icon

Step 2: Opening your CSS Styles

  1. Go up to Window>CSS Styles
  2. Once open, create a new style for your form button. Name the style something relating to the coloring of form buttons. Let's say "buttoncolor".

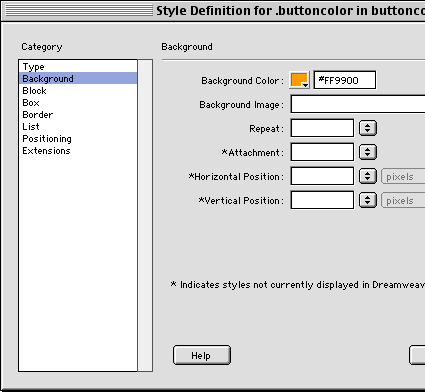
Step 3: Editing the New Style's Background

Select a new color for the button from the Background

Editing the New Style's Background

Step 4: Applying the Style

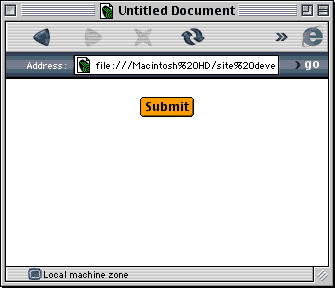
  1. Select the button in your document and while it's selected, click the buttoncolor style to apply the style. You won't be able to see the colored button until you preview it in the browser
  2. Click F12 to Preview In Browser
Applying the Style
source:http://www.cbtcafe.com/dreamweaver/formbtncolor/formbuttoncolor1.html

Closing Pop Up Windows with Text Links

Closing Pop Up Windows with Text Links


Version: Dreamweaver MX
Level: Basic
Objectives: To add the necessary JavaScript to close your pop up windows
Tools & Techniques: Behaviors, close window, JavaScript, pop up windows

Part 1: Closing a Pop Up Window with a Text Link

Generally, the "Close Window" link is at the bottom of the pop up page but you're welcome to put it anywhere you like.

Type out the text on your page. In this case, I'll use: "Close Window"

Select the text and in the Property inspector, add the following code:

javascript:self.close()

Property Inspector

That should do it. Go ahead and save your page and give it a try.

Part 2: Closing a Pop Up Window with an Image

Closing a window with an image is the same as with text links. Just add the same script to the image as you did the text link to make it work.

Select the image you want to use to close the window and add the following line of code to your Property inspector:

source:http://www.cbtcafe.com/dreamweaver/closebutton/index.html

Creating a Go Back Button

Creating a Go Back Button


This is a really cool tip to send people back to the previous page

TRY IT:

Here's the code:

Where you can change the Go Back text to say what you like. This is the text that appears on the button.

Next Example:

You can also apply this to an image button. Just select the button you want to use and type in the following Javascript:

javascript: history.go(-1)

source::http://www.cbtcafe.com/dreamweaver/goback/gobackbutton.html


Adding subject lines to your Email

Adding subject lines to your Email


This is a cool little HTML tip for automatically including a subject in any e-mail links on your site.

Create some text and then highlight it

This is the same procedure as creating a regular e-mail link, except you're going to add a little extra code after the normal link.

Go up to the Properties Inspector and in the Link field, type in:

mailto:help@cbtcafe.com?subject=Adding E-mail Subject Is Easy

Now, change the "help@cbtcafe.com" to your own e-mail address. Keep the "?subject=" and change the other text to match your subject.


source::http://www.cbtcafe.com/dreamweaver/emailsubject/emailsubject1.html

Linking To Adobe PDF/Acrobat files

Linking To Adobe PDF/Acrobat files


To display or link to .pdf files is as simple as linking to any other file. Simply hightlight the text or image you want to be the link and in the Properties Inspector, enter the link (URL) of the .pdf file. Acrobat will automatically launch and display the file.

Property Inspector

You can also specify the Target so that the .pdf document opens in the same window or a separate window just like you do any other HTML page.

If you prefer to have the .pdf file saved to the viewers hard drive rather than opening up in the Browser, you'll need to Zip it (using WiniZip) or StuffIt (using Stuffit). These are compression programs that "package" the file.

source::www.cbtcafe.com/dreamweaver/linkingpdf/linkingpdf.html


Understanding Null Links

Understanding Null Links


Null links are undesignated links. They are needed to attach behaviors to text.

For example: Open a new document and type out the word "link".

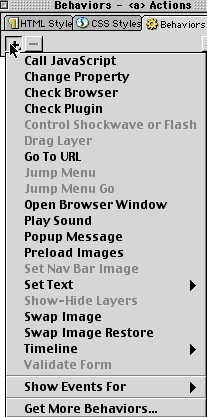
Now, going to the Behavior Panel, click the plus sign (+) to access the drop down menu and you'll notice most of the behaviors are unavailable. What if you wanted to launch a pop up window from the word "link"?

You could type the javascript in by hand but that's why we're using Dreamweaver: to avoid handcoding routine html/javascript.

To access the Behaviors, you need to first create a null link out of the text "link".

You do this by selecting the word (in this case "link") and going up to the Properties Inspector, input the following line in the Link Field:

javascript: void(0) OR you can type the pound sign: #

Properties Inspector

Properties Inspector

Either way will work.

Now, after you've input either code into the Link Field, go back to your Behaviors Palette and click the plus sign (+) and notice how many new behaviors are available!

Behaviors

source::http://www.cbtcafe.com/dreamweaver/nulllinks/nulllinks.html


Creating Rollover Images

Creating Rollover Images


Version: Dreamweaver MX, Fireworks MX
Level: Basic
Source Files: Download
Objectives: To create a JavaScript rollover using Dreamweaver MX's Insert Rollover command
Tools & Techniques: Behaviors, Insert Rollover, Rollover images
Final Example: Preview

In this lesson we'll create one of the most common techniques on web sites: Rollover images.

Note: Each image you have "rollover" is actually 2 images: 1 for the Up state and the for the Over state. Keep this in mind when creating your rollover graphics. The effect can be wonderful but you should also weigh the benefit of the effect against the download time of your pages. Too many rollover images can cause unnecessary download times to your pages.


Step 1: Creating the Rollover Graphics in Fireworks MX

In our example, the menu contains 3 buttons: about | contact | services. Each button has 2 states: The Up state and the Over state. This gives us a total of 6 graphics. This looked in Fireworks MX before exporting:

Button Graphics

It's very important that you export each graphic at the same size or your rollover images can be distorted.

In the image above, the bottom graphics (the Over state) are larger than the top ones. In order to ensure our images are the same size, we'll create a canvas the size as the largest image and then export every image from that canvas size.

The image size for each of the bottom graphics is: 101x24.

  1. Create a new file 101x24
  2. Place the larger (Over) graphic on the new canvas
  3. Set the X and Y coordinates in the Property Inspector to 0,0. This ensures the graphic is perfectly placed on the new canvas
  4. Copy the smaller (Up) graphic to the new canvas and line up the text so that it aligns with the bottom text
About buttons
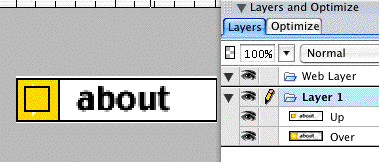
  1. Turn off the visiblity of the Over image (bottom layer) by clicking the Show/Hide Icon (the eyeball graphic). We're going to export the Up graphic first.
  2. Set the Optimize panel to Gif | Adaptive | 8 Colors
  3. Export the image and name it: "about_Up"
  4. In the Layers Panel, turn the visibility off for the "Up" graphic and turn the visibility on for the "Over" graphic
  5. Set the Optimize panel to Gif | Adaptive | 8 Colors
  6. Export the image and name: "about_Over"
  7. Repeat steps 1-10 for the remaing 2 buttons

Step 1: Inserting the Rollovers

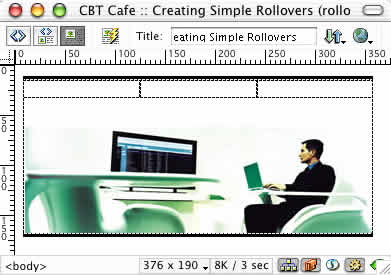
  1. Open "rollover_start.html"
  2. Place your cursor in the first table cell
Starting Image

  1. From the Insert Menu, select Insert > Rollover Image
  2. You can type in a name for the Image name and override Dreamweaver's default naming convention
  3. Set the Original and Rollover images by using the Browse button or by typing in the names. If you type in the image name be sure you type the path to the images correctly. I generally prefer to use the Browse button for the first image and then copy and paste the name for the Rollover image and make the necessary name changes.
  4. Dreamweaver will select "Preload Rollover Image" by default. Leave that option selected.
  5. Type in a descriptive name for the Alternative Text field. This is the text that is displayed when a the cursor is over the image
  6. Use the Browse button to navigate to the page you want the link to visit when clicked. You can leave this blank for this exercise and Dreamweaver will automatically set the link to a "null link" by placing the pound sign (#) in the Link field. Null links are temporary links that will not go anywhere but are needed for setting up the rollover image.
  7. Continue adding the rollovers for the remaining two buttons

null links

Step 2: Editing the Rollover Images

At point you may need or want to go back and change one of your rollovers after you've created them. You can easily do this by using the Behaviors Panel.

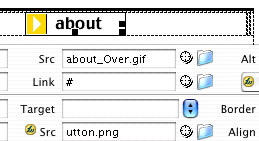
  1. Select the image you want to change
  2. To change the Up state of the button, click the Browse For File icon in the Property inspector and browse to the new image.
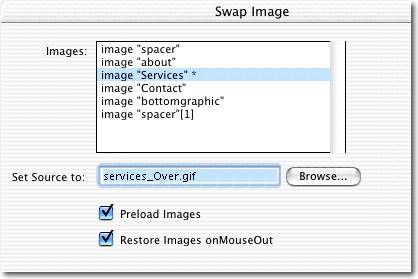
  3. To change the Over state of the image, go to the Behaviors Panel, double-click the (onMouseOver) Swap Image behavior. This is why naming your images when you set this up is so important.
  4. The image you select is the Up state of the image. That is the name that is highlighted in the Images field.
  5. Set Source to lets you change out the Over image for the currently selected image. In this case, we selected the Services button and if we change the Set Source to image, we'll have a different Over state for the Services button.
Swap Image

source::www.cbtcafe.com/dreamweaver/rolloverimage_mx/rolloverImages_2.html


Creating Pop Up Windows from Images

Creating Pop Up Windows from Images


Version: Dreamweaver MX
Level: Basic
Objectives: To create pop up windows from an image link using the Open Browser Window behavior in Dreamweaver MX
Tools & Techniques: Behaviors, Open Browser Window, JavaScript, Pop up windows

In this lesson you'll learn to open a new browser window from an image link.

Step 1: Creating a New Window from an Image

In this first example, we'll create a pop up window from an image already placed in our document. A common use for this is photo galleries where you have thumbnail images that when clicked, open a larger version of the image. Click the thumbnail below to open a larger version of the image.

If you're interested in learning how I created the irregular shaped image, check out the rounded corner tutorial in the Fireworks section.

Pop Up Window Thumbnail
  1. Select the image you want to open a new window
  2. With the image selected, go to your Behaviors Panel and click the plus (+) sign to open the drop down menu
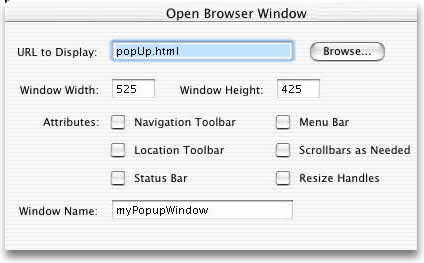
  3. Select the Open Browser Window action to bring open the dialog window
  4. Type in the name of the file with the correct extension (.htm, .html, etc) or, better yet, use the Browse to file button to locate the file
  5. Enter the width and the height of the window
  6. If you want the window to popup without any attributes, leave the remaining options blank
  7. Click OK to close the window and apply the settings

Open  Browser Window

NOTE: Naming the window is optional. One reason you would name your pop up windows is if you wanted all links to open in the same pop up window.

For example, say you have 5 links on a page each opening pop up windows and you didn't name the windows or named each window differently. When the viewer clicked each link, there would be 5 pop up windows open.

If you want to ensure only one window is popped up at one time, assign all your popup windows the same name.

Step 2: Changing the Events

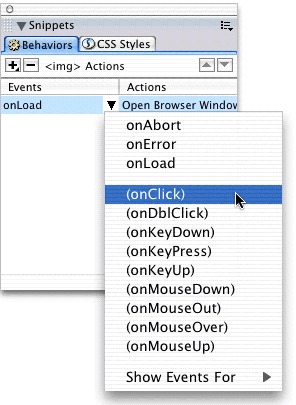
Depending on your current settings in the behavior panel, you may need to update the Event from onLoad to onClick. Do this if you want your viewers to click the image to load the new window.

If you prefer the popup window to automatically open when the page is loaded, (example: banner ads) leave the event to onLoad.

  1. Click once on the behavior you just added to highlight the behavior
  2. You should now see a black arrow pointing downward. Click on that arrow to open the drop down menu and change the onLoad to (onClick) Event.
Behaviors On Click
source::http://www.cbtcafe.com/dreamweaver/popup_image/index.html

Show-Hide Layers

Show-Hide Layers


In this example we're going to take a look at using Layers and how you can use the Show-Hide Layers to create interactivity with menu items.

To preview the final version, click here

Step 1: Defining a New Site

You should define a new site for this tutorial. If you need assistance on Defining Sites, click here to go through that lesson...It will only take 5 minutes and if you haven't already learned to Define Sites, it could possibly be the best 5 minutes you spend in Dreamweaver.

Step 2: Setting Up the Site

My site for this lesson is called "showhidelayers" and in this folder I have an index.html and 4 images: apple.jpg, banana.jpg, peaches.jpg, and strawberry.jpg.

  1. Create a new document and save it.
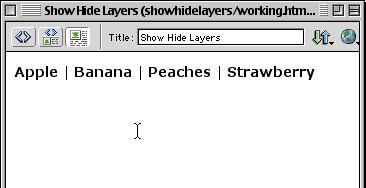
  2. Type out the following names for links: Apple | Banana | Peaches | Strawberry.

Setting Up the Site

Step 3: Creating a New Layer

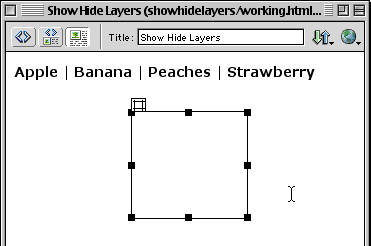
  1. Click the Draw Layer button
  2. On the Objects Palette and drag out a new layer.
Creating a New Layer

Don't worry about the size of the layer or the positioning for now. We'll clean that up soon enough.

Step 4: Renaming Layer 1

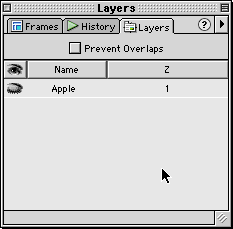
  1. Go over to the Layers Palette and you'll notice "Layer 1" has been created. That's the layer you just created.
  2. Double click the "Layer 1" to rename the layer to "Apple"

Step 5: Inserting an Image in the Apple Layer

  1. Go back to the layer you just created and position your cursor inside the layer and click once.
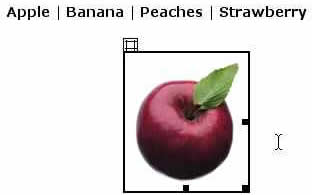
  2. On the Objects Palette, click the Insert Image to insert an image into the layer. In this case, I'll insert the image: apple.jpg.

Here you'll see the apple positioned inside the layer.

Inserting an Image in the Apple Layer

Step 6: Resizing the Layer

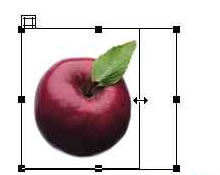
  1. Scale the layer to fit perfectly around the apple image.
  2. Move your cursor over the edges of the layer until you see the cursor change into a "hand". Once you see the "hand cursor", click once to select the layer. Once you've selected the layer, you'll notice the black selection handles. Move your cursor over the black selection handle until the cursor changes into a double-sided arrow.
  3. Grab the middle one on the right side and drag inward. This will scale the layer to the width of the image.
  4. Do the same thing for the bottom resize handle, dragging towards the center of the image.

You can also resize the layer to the size of the image numerically. Click once on the image and then go up to the Properties Inspector and in the image properties, note the width/height and input the values in the W and H fields (Width and Height).

Resizing the Layer

Step 7: Turning Off the Apple Layer's Visibility

  1. In the Layers Palette, click in the Eye-Icon Column for the Apple Layer..
  2. To hide the layer, click until you see the eye closed.

Turning Off the Apple Layer's Visibility

That's basically it. Repeat steps 5-11 for your remaining images. Once you've completed that, go on to the next step for next part of the lesson:)

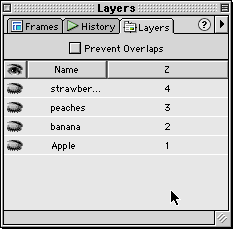
Here's what my document/layers palette looks like with all four layers:

Turning Off the Apple Layer's Visibility

Step 8: Adding the Behaviors

Now, we want to add the behaviors to each of the links in the menu so that when we mouse over each link, the appropriate image appears.

  1. Double click inside the "Apple" link up top to select it.
  2. before we can add the behavior, we need to create a null link.
  3. You do this by typing the # sign in the link window. For more on null links, click here.
  4. Go over to the Behaviors Palette and click the plus (+) sign.
  5. From the drop down menu, select Show-Hide Layers.
  6. Here you'll see the four layers you created for your 4 images.
  7. Click the "apple" layer and then click "Show" to show the layer. Click OK.
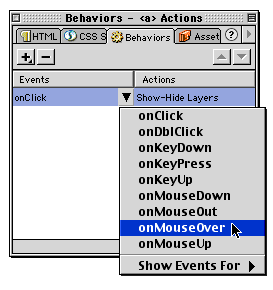
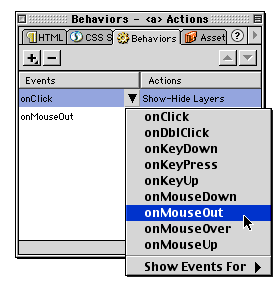
  8. Next, let's change the "OnClick" to "OnMouseOver". We need to add the "OnMouseOut" behavior to the link so that when you remove your mouse from the "apple" link, the apple image disappears.

Adding the Behaviors

  1. Click the plus sign (+) again and select Show-Hide Layers again.
  2. Again select the Apple layer, this time selecting "hide" from the buttons on the bottom. Click OK.
  3. Next, change the action "onClick" to onMouseOut.

Step 9: Testing your Behaviors

  1. Let's do a quick Preview In Browser to see if it's working.
  2. After you see it looking good, go ahead and repeat steps 12-20 for your remaining images.

Here's how your Layers Palette should look for the 4 images:

Testing your Behaviors

Step 10: Aligning the Layers

After Previewing in my Browser, I notice that the layers/images are kind of all over the place and not very cleanly organized. In this final section, we'll align our layers to be centered both horizontally and vertically to each other.

  1. Determine where you want the images to be. I'm going to use the center of the nav bar as a guide, and about an inch down.
  2. Make one of the layers visible by clicking on the layer. The layer will only be temporarily visible. We're just using it to assist us in determining where we want to align the layers.
  3. Click on the Apple layer and drag it into position.
  4. Once in position, notice the coordinates of the layer by going up to the Properties Inspector and making a note of the L (left) and T (top) numbers.
  5. In this example it is L:109 and T:57. Now, either remember the those number for the positioning or write it down (remember 2 numbers? no way!)
  6. Click away from the layer to deselect it.

Step 11: Repositioning the Banana Layer

  1. Select the next layer, in this case it's the Banana Layer. Don't worry about moving it
  2. Go up to the Properties Inspector and in the T and L fields, input the numbers you wrote down (or remembered) into their respective fields and hit enter.
  3. This moves it to the same position as the Apple Layer without having to fuss with moving it manually.

In case you wanted to manually move it, you can either drag the layer as you did with the Apple Layer or you can use your arrow keys to nudge it one pixel at a time.
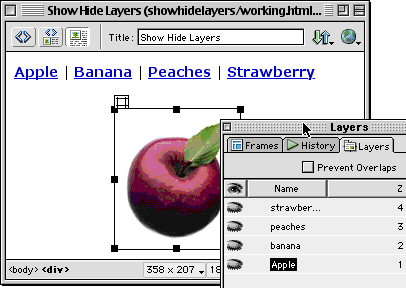
That's basically it. Just repeat step 26 for the other two layers and you're finished!

Preview In Browser to test your page or click here to view my version.

source::http://www.cbtcafe.com/dreamweaver/showhidelayers/showhidelayers4.html